How to Set Up a PMU Tattoo Machine: Step-by-Step Guide
2025-06-24 04:01:15
,
Beauty health care
Learn how to set up a PMU tattoo machine like a pro. From hygiene to voltage settings, follow this guide to achieve safe, flawless results.
How to set up a PMU tattoo machine is one of the most essential skills every aspiring and professional artist needs to master. Whether you’re preparing for your first client or refining your routine, a proper setup ensures not only flawless results but also a safe, hygienic environment. From selecting the right PMU machine accessories to adjusting voltage settings for brows, lips, or eyeliner each detail matters. In this guide, you’ll learn exactly how to set up your PMU machine step by step, so you can work confidently, beautifully, and professionally from day one.

Tools & materials you’ll need before setup
Before learning how to set up a PMU tattoo machine, it’s essential to prepare the right tools. The right setup not only ensures smoother procedures but also reflects your commitment to beauty, safety, and professional standards.
Essential PMU machine accessories include:
- PMU machine & power supply: Your core tools. Choose machines designed specifically for permanent makeup work.
- Disposable needles or cartridges: Opt for single-use, sterile cartridges. Popular options include round liners (RL) for fine lines and magnum shaders (M1) for filling.
- Gloves, barrier film, alcohol pads, and tape: These protect both you and your clients from contamination.
- Optional but helpful: Practice skin for testing your setup and a foot pedal to control machine power hands-free.
Using sterile, single-use PMU accessories is non-negotiable. It builds trust, keeps procedures hygienic, and protects your artistry. It builds trust, keeps procedures hygienic, and protects your artistry.
Want help choosing the right device? Don’t miss our detailed PMU machine review.
Step-by-step: How to set up a PMU tattoo machine
Setting up your PMU tattoo machine correctly is the foundation for safe, flawless results. Whether you’re a beginner or brushing up your skills, this guide ensures every step is rooted in hygiene, confidence, and beauty-forward precision.
Step 1: Sanitize your workspace
Start by disinfecting your work surface and tools. Always wear disposable gloves to maintain a sterile environment your clients deserve nothing less.
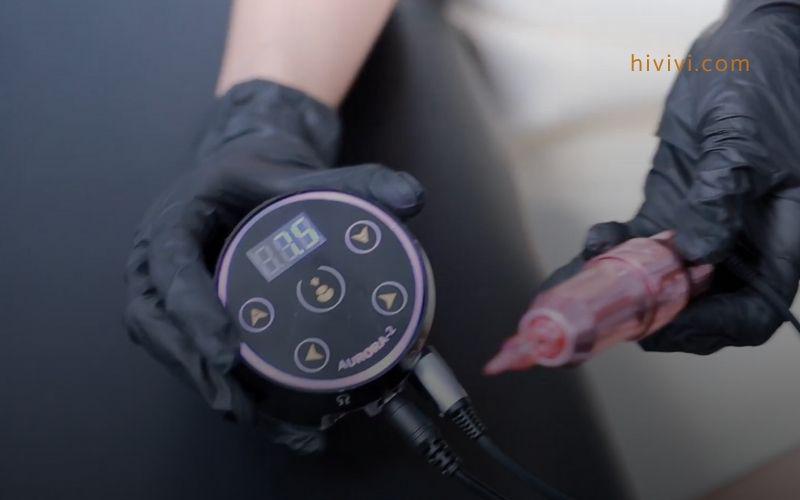
Step 2: Connect the power supply
Plug your power cord into the PMU machine’s power supply. Once the voltage display lights up, connect your machine to the cord securely.

Step 3: Insert the needle or cartridge
Use a disposable, sterile needle from your trusted PMU machine accessories. Remove it carefully from the packaging and insert it into the machine with a clockwise twist until snug.
Step 4: Adjust settings (PMU machine voltage settings)
Match voltage to your treatment:
- Brows: 6.5–8V
- Lips: 7–8.5V
- Eyeliner: 6.5–7.5V
Fine-tuning your PMU machine voltage settings ensures pigment implantation is both safe and beautiful.
Want to learn how to use a PMU machine for lip tinting? We’ve got a step-by-step guide for that too.
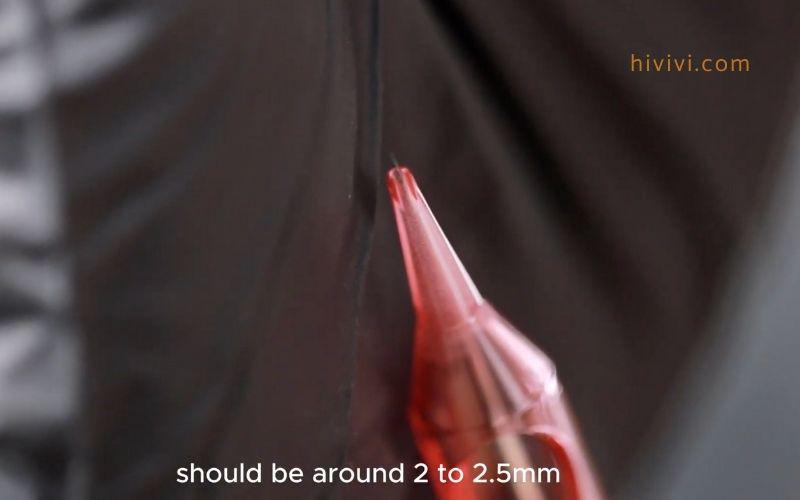
Step 5: Set the needle length
Adjust your machine grip or body to set the needle depth. For most PMU procedures, 2.0–2.5mm is ideal.
Step 6: Wrap for hygiene
Wrap your machine with barrier film or tape. This helps prevent contamination and improves your grip during procedures.
Final check
Run a quick test. Ensure the machine runs smoothly and voltage remains steady. Now, you’re ready to create beauty with confidence.
Common mistakes to avoid
Even with the best tools and intentions, small setup errors can affect both your PMU results and your client’s experience. Being mindful of the most common mistakes helps you troubleshoot with confidence and grow as a beauty professional.
Using the wrong needle type or size
Not all needles are created equal. Using the wrong cartridge for brows, lips, or eyeliner can lead to uneven pigment or skin trauma. Always match the PMU machine accessories to the procedure and skin type.
Setting the wrong voltage
Incorrect PMU machine voltage settings can cause skipping, overworking the skin, or shallow pigment. Refer back to voltage ranges for each area and adjust gently based on real-time feedback.
Not securing the needle properly
If the needle isn’t locked in place, it may loosen mid-procedure. Twist clockwise until firm, then check again before starting.
Forgetting to wrap your machine
Skipping barrier film means skipping safety. Wrapping not only protects your PMU tattoo machine but ensures hygienic, professional results.
Skipping the test run
Always test your machine before starting. This quick step solves many PMU setup troubleshooting issues before they happen.
Remember: A confident artist is a prepared one. Each avoided mistake is a step toward mastery.
Expert tips for first-time setup
Setting up your PMU tattoo machine for the first time can feel intimidating but with a little practice and support, you’ll move from hesitant to confident in no time. These pro tips will help you avoid common mistakes and get the most from your PMU machine accessories and tools.
Practice setup before working with clients
Before your first live session, go through your full PMU setup process several times. This helps you identify any challenges with your machine, power supply, or cartridge fit.
Use a checklist every time
Even seasoned artists forget steps! A printed checklist can guide you through essentials like sanitizing, connecting the power supply, setting needle depth, and wrapping your machine for hygiene.
Start with practice skin
Use silicone practice pads to get a feel for your machine’s vibration, needle movement, and PMU machine voltage settings. It’s the safest way to build muscle memory.
Ask for feedback from a mentor
If you trained with a PMU educator, don’t hesitate to send them a video of your setup for feedback. A second set of eyes can spot what you might miss.
PMU tattoo machine setup – FAQs for beginners and pros
What is the ideal voltage setting for PMU brows?
For PMU eyebrows, the ideal voltage range is 6.5–8V. Adjust slightly based on skin type and pigment flow.
Can I use tattoo needles for PMU?
No. Always use PMU-specific cartridges or needles, which are designed for precision and safety on delicate facial areas.
How deep should PMU needles go?
PMU needle depth should typically be 2.0–2.5mm, depending on skin type and the procedure area.
Do I need to wrap my PMU machine?
Yes. Wrapping with barrier film is essential to maintain hygiene, prevent contamination, and improve grip.
Why is my PMU machine skipping?
It could be due to incorrect voltage settings, a loose needle, or not performing a proper test run.
How to set up a PMU tattoo machine with confidence starts with the right habits: a clean, sterile workspace, choosing the right PMU machine accessories, setting the correct voltage, and ensuring your needle is secure and aligned. Every step from adjusting PMU machine voltage settings to wrapping your machine plays a role in delivering beautiful, safe results.
Consistency is key. Practicing your setup routine, maintaining hygiene standards, and checking for issues early (like loose cartridges or incorrect voltage) will help you grow as a beauty professional. If you’re ever unsure, refer back to your PMU setup troubleshooting checklist or better yet, practice with a mentor or on practice skin until it feels second nature.
Want to keep leveling up your PMU skills? Explore our blog for in-depth tips, or dive into tutorials designed for ambitious artists like you. You’ve got the tools. You’ve got the talent. With practice and the right guidance, you’re ready to create beauty with confidence.